Quick answer
Bleed is extra artwork that runs past the trim edge, so there is no white line if the cut moves slightly. To set up artwork for print: build the document at the finished size, add 3mm bleed on every trimmed edge, keep text and logos at least 5mm inside the trim (the safe area), use images at 300dpi at the size they will print, set colours to CMYK (plus any Pantone spot colours), embed all fonts, and export a print-ready PDF, ideally PDF/X-1a or PDF/X-4. These are the specifications Fretwell works to, and our pre-press team checks every file before it goes to plate or press.
Key takeaways
- Add 3mm bleed to every edge that will be trimmed. Backgrounds, photos and colour panels that touch the edge must extend into it.
- Keep text, logos and anything important at least 5mm inside the trim line. That is the safe area.
- Images should be 300dpi at the final printed size. Enlarging a low-resolution image in the layout does not add detail.
- Supply a PDF/X-1a or PDF/X-4 file with fonts embedded and crop marks and bleed included. We also accept native InDesign, Illustrator and Photoshop files.
- Folded leaflets, saddle-stitched booklets, perfect-bound spines and window envelopes each need extra set-up. Ask us for a template before you design.
Bleed, trim and safe area explained
Print is produced on larger sheets and cut down to size on a guillotine. Cutting is very accurate, but stacks of paper can move fractionally. If a background colour stops exactly at the trim line, any movement leaves a thin white edge. Bleed solves this by carrying the artwork past the cut, so the guillotine always cuts through printed colour. The safe area does the opposite job: it keeps important content far enough inside the edge that it can never be trimmed off.
| Zone | Where it sits | What goes there | Fretwell specification |
|---|---|---|---|
| Bleed | Outside the trim line | Backgrounds, images and colour blocks that run off the edge | 3mm on every trimmed edge |
| Trim line | The finished size of the piece | Nothing critical: this is where the cut happens | Your document size, e.g. 210 × 297mm for A4 |
| Safe area | Inside the trim line | All text, logos, page numbers, QR codes and borders | At least 5mm inside the trim |
Avoid thin borders close to the edge
A frame or border a few millimetres inside the trim will show any small movement in the cut as an uneven margin. Either keep borders well inside the safe area or remove them.
How to set up artwork for print, step by step
- 1
Start at the finished size
Create the document at the trimmed size, for example A5 (148 × 210mm). See our paper sizes guide for standard dimensions. For a folded leaflet, ask for a template with the panel widths, as they are not always equal.
- 2
Set 3mm bleed
In InDesign or Illustrator, set bleed to 3mm on all sides in the document set-up. Extend every background, image and colour panel that touches the edge to the bleed line.
- 3
Mark the 5mm safe area
Add margins or guides 5mm inside the trim and keep all text, logos and key details inside them.
- 4
Place high-resolution images
Use images at 300dpi at their placed size. A 300dpi image scaled to 200% in the layout is effectively 150dpi in print.
- 5
Set colours to CMYK
Convert RGB images to CMYK using the profile we recommend, and keep any brand Pantone colours as named spot colours only if the job is being printed with spot inks. Our CMYK vs RGB vs Pantone guide explains the difference.
- 6
Handle black properly
Set body text and fine lines in 100% black only. A 'rich black' (black with cyan, magenta and yellow underneath) can give large solid areas more depth, but on small text any slight misregistration shows as coloured fringes. Ask us for our recommended rich black build.
- 7
Export a print-ready PDF
Export as PDF/X-1a or PDF/X-4, with bleed and crop marks included and all fonts embedded. Check the PDF at full size before sending.
| Setting | Recommended | Why |
|---|---|---|
| File format | PDF/X-1a or PDF/X-4 | PDF/X standards are designed for print exchange: fonts and images are embedded and the output intent is defined |
| Bleed | 3mm all trimmed edges | Prevents white edges after cutting |
| Safe area | 5mm inside the trim | Keeps important content clear of the cut |
| Image resolution | 300dpi at final size | Sharp detail at normal reading distance |
| Colour | CMYK, plus named spot colours where used | Matches how the job will be printed |
| Fonts | Embedded (or converted to outlines) | Avoids missing or substituted fonts |
| Marks | Crop marks outside the bleed | Shows the finisher exactly where to trim |
Colour profiles and total ink coverage
When you convert to CMYK, the colour profile you use decides how much ink each colour needs. Too much ink in the darkest areas can cause slow drying, set-off between sheets and muddy shadows. This is controlled by the total ink coverage: the four CMYK values added together. The current profiles for offset printing from the European Color Initiative, PSO Coated v3 (FOGRA51) for coated paper and PSO Uncoated v3 (FOGRA52) for uncoated paper, are both built with a maximum total coverage of 300%.
| Profile (ECI) | Paper | Characterisation data | Maximum total ink |
|---|---|---|---|
| PSO Coated v3 | Premium coated (gloss and silk) | FOGRA51 | 300% |
| PSO Uncoated v3 | Wood-free uncoated white | FOGRA52 | 300% |
If you are not sure which profile to use, ask before you convert. Our pre-press team checks colour profiles on every file and our proofing is calibrated to ISO 12647-2, so the proof you approve is an accurate guide to the printed result. Trapping, the slight overlap between adjoining colours that hides tiny registration differences, is checked by our pre-press team as part of every file check, so you do not need to add it yourself.

Pre-press, print and finishing under one roof
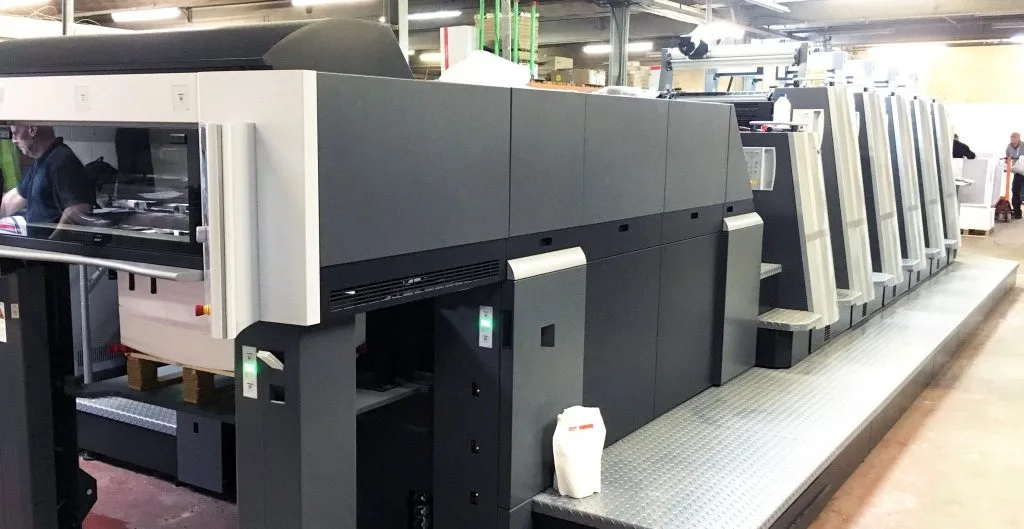
Every file checked before it goes to plate, with calibrated proofs and B2 Heidelberg litho and digital presses in Keighley.
Explore the serviceFolds, booklets, spines and mailings
Flat sheets are straightforward. Anything that is folded, bound or posted needs a little more planning, and it is far easier to build it in from the start than to adjust finished artwork.
| Format | What to allow for | Read more |
|---|---|---|
| Folded leaflets | Panels that fold inside are made slightly narrower so the leaflet closes flat. Keep text away from fold lines, and ask us about creasing heavier stocks so they fold cleanly. | Leaflet fold types |
| Saddle-stitched booklets | Page counts in multiples of four. On thicker booklets the inner pages push outwards (creep), so keep content well inside the outer edge. | Binding methods |
| PUR perfect-bound books | A printed spine whose width depends on page count and paper. Ask us for the spine width before finalising the cover. | Binding methods |
| Window envelope mailings | The address must sit exactly behind the window. For Mailmark letters, windows sit at least 15mm from the top and sides and 18mm from the bottom. | Envelope sizes |
For personalised mailings, the letter design also needs space for the variable data, such as names, addresses and reference numbers, and the barcode zone. Our data team will tell you exactly where these sit before you design. See our direct mail service for how a mailing pack comes together.
Pre-flight checklist before you send
- Document is at the finished trim size, with the right number of pages (multiples of four for saddle-stitched booklets).
- 3mm bleed on every trimmed edge, with backgrounds and images extended into it.
- All text and logos at least 5mm inside the trim.
- Images are 300dpi at placed size and converted to CMYK.
- Only the spot colours you intend to print are named as spots; everything else is CMYK.
- Body text and fine lines are 100% black, not a four-colour mix.
- Fonts embedded or outlined; no missing links or low-resolution previews.
- Exported as PDF/X-1a or PDF/X-4 with crop marks and bleed.
- Spelling, phone numbers, web addresses and prices proofread. For mailings, our direct mail campaign checklist covers the final checks.
- Folded, bound or mailed pieces checked against the template we supplied.
| Common problem | What you see in print | Fix |
|---|---|---|
| No bleed | Thin white edges after trimming | Extend backgrounds 3mm past the trim |
| Text too close to the edge | Words trimmed or crowded at the edge | Move inside the 5mm safe area |
| Low-resolution or web images | Soft, blocky or pixelated pictures | Replace with 300dpi originals |
| RGB images left in | Unexpected colour shifts | Convert to CMYK and check before sending |
| Small text in rich black | Coloured fringes around letters | Set text in 100% black |
| Fonts not embedded | Substituted fonts or reflowed text | Embed fonts or convert to outlines |
Large files can be sent via our secure SFTP; login details are supplied on request. If anything in your file needs attention, our pre-press team will contact you before the job goes to press.